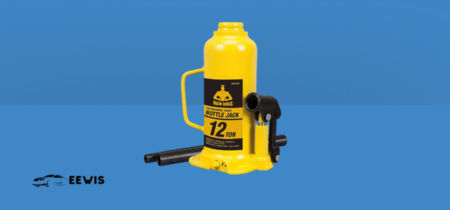
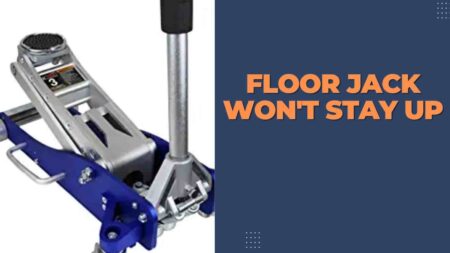
When you have a broken bottle jack in your garage, it may be worth seeing whether you can rebuild it and make it workable again. Problems with bottle jacks mainly stem from broken or damaged seals, so sometimes replacing the seals will help.
Suppose you don’t know how do you repair a bottle jack; thus, our guide will help you. You can also rebuild a jack to extend its usable life. Regardless, bottle jacks are relatively affordable, and sometimes a rebuild kit is more expensive than a new jack.
A bottle jack is a vital part of any home garage and workshop. This tool will enable you to lift your vehicle safely off the ground. These jacks are robust and execute high-duty work but are vulnerable to damage regardless of the sturdy design.
We will also make you skilled in the common problems that may hit its function and teach you how to repair a bottle jack and make your jack workable. Luckily we have compiled a complete guide on how to rebuild a bottle jack and identify the main issues behind it.
This procedure shouldn’t be part of your regular maintenance, but it may be helpful if the jack needs repair. So this blog post will also highlight a few handy maintenance tips. Thus, you must keep reading on and get a complete step-by-step guide on how to repair a bottle jack.
You can choose the best bottle jack from this article: Best Bottle Jacks For RV and Travel Trailer
The Most Common Issues A Bottle Jack May Encounter
At the very first, determine what the problem is. Therefore, diagnosing and fixing the problem is crucial. Regardless, if your bottle jack is old and not working correctly or not holding pressure, thus, you may find it problematic or impractical to use it.
Various factors can create problems with your bottle jack, leading to breaking down or going wrong. The following are different potential causes for malfunctioning bottle jacks:
- When the O-rings wear out, the oil will leak from your Best Bottle Jack.
- A Bottle jack may lose pressure because of dirt and debris entering the system.
- The jack will not work when there is too much oil or not enough oil.
- Seal leaks or hydraulic pump issues are the most common.
- The trapping of air within the hydraulic fluid.
- The bottle jack’s release valve failed to function perfectly.
- If the jack’s system has a leakage, then the jack will lose its pressure.
- If you overload the bottle jack, it won’t hold pressure.
- It is possible for the Rubber Plug to wear out, damage, or break, which will make your jack useless.
- Cracks or bends in jack pistons make the jack defective.
A Step-By-Step Guide – How Do You Repair A Bottle Jack
Here we will guide you with professional guidance about repairing your malfunctioning bottle jack. In addition, you will learn how to disassemble the bottle jack to inspect the internal and external damaged parts to rebuild them. Let’s catch up on how to rebuild a bottle jack.
Step 1: Clean Your Jack Outright
First, clean your bottle jack from the inside and outside. As time passes, dirt and debris find their way into the jack’s seals and valves, causing the jack to lose pressure.
Thus, you must remove any grime, grease, or slime that could block the system. Accordingly, you must entirely clean your bottle jack to prevent the jack from losing pressure.
Step 2: Examine The Broken Parts Of The Jack
Once you clean your bottle jack thoroughly, now, examine your jack precisely and notify any damaged parts. You also make sure the jack base is unbroken and free from splits or cracks.
Plus, there is no damage to the handle and piston. If you encounter any wear, replacing your jack-damaged part is imperative to make it workable.
Step 3: Remove The Oil Reservoir Plug
In this step, you should remove the oil reservoir plug of your bottle jack and pour the oil into an empty pot. You will find this plug on the side of the jack. So you can release it with the help of a wrench swiftly. After removing it, you must be careful to protect it from the crack.
You have to unscrew the handle assembly and detach it, then pull out the pumping piston attached to the handle. You can do it manually when you remove the hydraulic lubricant; however, you may have to turn the jack in a vice.
You can now proceed to the following stage. In case it breaks or cracks, switch to a new one. Always keep this plug in an excellent working state at all times.
Step 4: To Remove The Release Valve
Once you remove the plug, you can easily remove the safety valve, which you will find at the top of the piston. Therefore, you can easily unscrew the release valve and discover the inside of your jack for repair.
As a result, you can search beneath for a ball or pin that controls the flow. With the help of a pencil magnet, you can remove it. If the pin or ball in the valve needs replacement, replace it. Mostly, it just requires to be set back into place. Next, you should replace the bolt at the top.
Step 5: Remove The Safety Overload Valve
Now you should uninstall the safety overload valve. It is a screw set close to the release valve. After removing it, you will discover two balls and two springs. You must ensure to replace the overload valve springs and balls.
You must insert balls with minor diameters first, then smaller springs, and successive more giant balls and larger springs. Even though there are more plates and dividers also present there.
It is noteworthy to record the order in which you get off these components because it will be easy for you to put them again in the same order.
Step 6: Removing The Piston
After performing the above step, identify the piston placed inside the jack. It is necessary to remove the piston to fix your bottle jack. As you get the jack piston inside, use a pipe wrench to unplug the nuts holding the piston.
Besides, after losing the nuts, you will quickly dislodge the piston from the jack and pull it apart into its parts.
Step 7: Clean The Piston
After encountering the piston, you must clean it. Therefore, wiping out lard, grime, or debris from the piston is highly advisable. You can go to the following step after cleaning the piston.
Step 8: Find Out Any Damage On The Piston
After cleaning the piston, you will find any damage. You also confirm that the O-ring on the piston is intact and undamaged. If you find the O-ring is damaged, you must replace it with a new one.
Step 9: Replacement Of The O-Rings And Washers
After identifying the damage to O-ring, you must install new o-rings and washers that are available separately or that come with the rebuild kit to replace the old ones. To avoid any damage, remove the o-rings from the side away from the sealing surface.
Before installing the O-rings and washers back into their place, you must soak them in the hydraulic fluid that will help you a lot with the sealing.
Step 10: Refill Your Bottle Jack With New Hydraulic Fluid
Afterwards, the bottle jack must refill with new fluid and bleed the trapped air from the unit. You can bleed the trapped air from the system by opening the release valve and pumping the handle several times to expel all the trapped air.
You also have to drain the old fluid, which you can accomplish by releasing the drain plug. Upon removing the plug, you can quickly drain the old hydraulic fluid. After draining out old fluid, you can refill it with new high-quality fluid.
Always use the best quality fluid for the refilling of your bottle jack. The type of fluid that you use is up to you. Regardless, the hydraulic fluid should be of high quality. After refilling the jack with new fluid, you must reinstate the drain plug and keep it tight.
Step 11: Rubber Plug Must Be Tight And In A Good Condition
Always keep the rubber plug in a tight and good condition to avoid leakages when the jack’s rubber plug becomes damaged or broken. As a result, the fluid will leak out, preventing the jack from holding pressure.
Thus, it is necessary to replace a damaged plug because your jack may leak out a fluid.
Step 12: Verify The Tightness Of The Release Valve
Although you have fixed all the issues in the jack, its saddle is in the right place, and the handle works as it should. But the jack is still not working correctly or not holding pressure? Undoubtedly there is an issue with the tightness of the release valve. You must check it.
Besides, you must tighten the jack release valve and adjust it appropriately. You should remove the cap and press down on the valve to address the problem. When the air hiss out, it shows that the valve isn’t sealing properly and needs replacing.
If the release valve is not the problem, there is likely a severe problem with the jack itself. Now, you must replace this jack with a new one. You have almost done the job! As a result, you’ve learned how to repair a bottle jack.
Regular Maintenance Tips For Your Bottle Jack
Regular maintenance and servicing will make your bottle jack efficient and long-lasting. We recommend lubricating all moving parts with premium lubricating oil. Lubricating your jack’s internal parts will enable the jack to run smoothly and effectively with minimum friction.
- Avoid overloading and make your jack long-lasting.
- Always take care of the seals and O-rings that protect your jack from leaks.
- Regularly monitor the hydraulic oil level and keep it to the recommended level. As a result, a proper amount of fluid will make your jack efficient.
- Always ensure that the rubber plug is in a tight and good condition. So regularly inspect it to prevent oil leakage.
- Keep the release valve adjustment correctly to make it active in handling and avoid malfunctioning.
- Keep your bottle jack clean and protect it from every kind of dirt and debris which may damage the system. When these particles enter the unit, they make the seals and valves out of work.
- Lubricate the internal parts with quality fluid that will make them efficient and fast in working.
- Always tack care of the jack piston; if it is damaged or bent, your jack will leak out hydraulic fluid, resulting in pressure loss.
- Bottle jack also trapped air in the system, thus you must bleed the system and expel the trapped air.
- As a final note, check your jack periodically, especially when it gets dysfunctional.
You should regularly check your jack’s internal and external parts, such as cracked welds, rusty pistons, ruined parts, and oil leaks. Also, inspect your jack’s ram by turning it on either side. As a result, you will maintain a healthy bottle jack that will offer long-lasting performance.
Frequently Asked Questions (FAQs)
What Is The Best Brand Of Bottle Jacks?
Your search is over for the best brand of bottle jack; here are the top 5 best bottle jacks. You can purchase, as per your requirement.
Powerbuilt 3 Ton, Bottle Jack and Jack Stands All-in-One
BIG RED T90203B Torin Hydraulic Welded Bottle Jack–Budget-Friendly, 2, 4 and 20 tons capacity.
Pro-Lift B-004D Grey Hydraulic Bottle Jack- 4-tons capacity with high-Durability
Pro-Lift B-006D Hydraulic Bottle Jack – 6 Ton Capacity–High-Durability
BIG RED T92007A Torin Hydraulic Stubby bottle jack– Best Low Profile with 12 and 20 tons Capacity
How Do You Fix A Bottle Jack That Won’t Lift?
All the jacks, including bottle jacks, encounter these issues (bottle jack won’t lift). Lack of fluid is the main reason, or it has trapped air in the system.
Thus, add hydraulic fluid, turn the jack to its release position, and pump several times to expel the trapped air from the system.
After refilling the reservoir and bleeding the system, you must carefully replace the seal tightly. So you have done the job, and your bottle jack will work correctly again.
Can You Fix A Leaking Bottle Jack?
Yes, you can fix your leaking bottle jack. Sometimes, when your bottle jack leaks, you might need to tighten a bolt at the piston. As a result, the seal will become tighter, and the jack will stop leaking.
Why Does My Bottle Jack Won’t Go Down?
Why won’t my bottle jack go down? The most common reason a bottle jack would encounter is the stucking in the up or down position. All the jacks may get this problem because air trapped within the hydraulic pump prevents the jack from lifting or lowering in the full range.
Therefore, it is crucial to bleed or purge the air from the jack, which is a simple process if you know how to do it.
Why Do Bottle Jacks Fail?
Bottle Jacks are pretty simple; pistons in every jack use hydraulic pressure, which helps to lift your vehicles (when you’re working under it) in the air through a network of pipes and chambers.
As a result, the bottle jack fails when its rubber seal wears out, or the check balls get damaged. Cheek balls are tiny little balls helping to move the hydraulic fluid between chambers. Thus, when these problems arise, your bottle jack will need to be fixed.
Conclusion – How To Repair A Bottle Jack
To cut the story short! Though with the above-said tips, we hope you have learned how do you fix a bottle jack that won’t hold pressure? You will also have got the skill of how do you fix a bottle jack that won’t lift and will identify the real issue, which is quite tricky.
Fortunately, you have gone through the practical guide that has taught you how to rebuild a bottle jack, and you benefit from it. Thus, the above-mention issues are usually the leading causes of failure of a bottle jack that would not hold pressure and get malfunctions.
However, they are manageable to solve with the help of regular maintenance. Thus, you can avert the potential problems that stop it from routine work. Always keep your jack clean and dry. As a result, your jack will last longer and give you a higher return on your investment!
Writing this post about how to repair a bottle jack has been an enjoyable experience. Wishing you all the best! Please leave your valuable comment in the box below; we will appreciate it.
I am Lucas. I am an auto enthusiast and I have many years of experience in this industry.
I created eewis.com to share my experiences and assist you to seek out the right products.


